Black Runtz has a strong citrus and cream nose and flavor. The nugs feel great, and squish perfectly between my fingers. It’s not dry, and bounces back beautifully after squishing.
It gives strong, indica heavy effects for sure. Im not gonna lie, I was almost uncomfortably elevated after taking the hits for this video, and it’s been a long time since that’s happened. This one is a heavy hitter for sure.
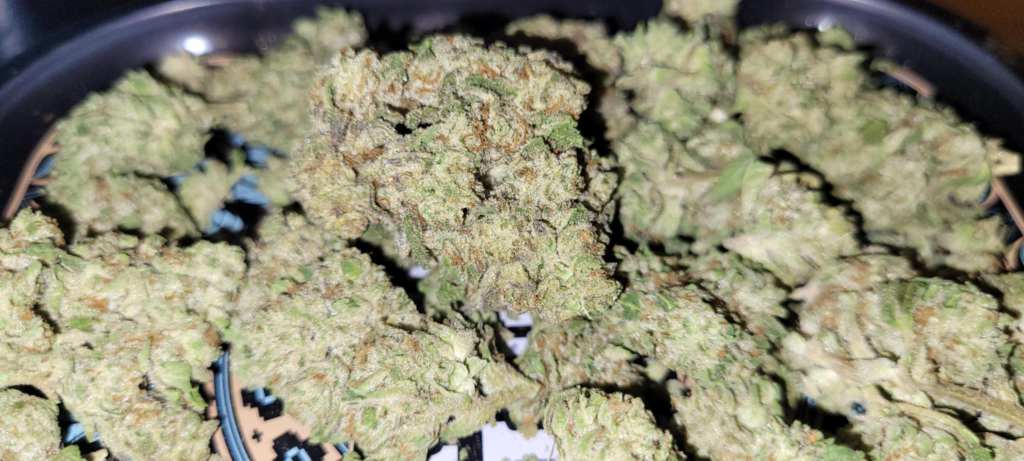
Bangkok Purple is an incredibly potent sativa flower, bred originally by LIT Farms. The citrus/cleaner terps are absolutely wild, and so strong.
This is the perfect strain for a wake n bake, going to work, going on a hike, or any task requiring focus or creativity. I may be a bit biased in this review, as these terp profiles are my absolute favorite from when I was out in California. This is what I associate with great flower, and I’m so happy to have found it online.
Bangkok Purple high will hit you pretty quickly, rushing into your brain with a tingly stimulating mental energy. A light sense of calm and relaxation accompanies this mental boost, keeping you in a place of zen no matter how high your energy levels soar.
This one gets a solid 10/10 from me! In my top 2 favorite strains I’ve ever had, in my 15+ years of smoking.
This white truffle comes with chunky, fat nugs. It’s nice and fresh, super sticky, and smells great. After taking these pictures, my fingers are practically too sticky to type well on my phone, and I can smell them too. Like I just got done trimming a fresh harvest, it’s so pungent.
The nugs are so sticky I can just gently press them against each other, and they completely stick together. No pressure needed. Taste and smell are strong skunk, it’s been a while since I’ve had skunky terps this strong from the cult. It’s feeling great and nostalgic for that!
The high feels pretty old school to me too, in a great way, but maybe I’m just feeling extra nostalgic now. But I just ripped it out of my ruby twist and it’s smacking, got me pretty spacey and happy. I love having the flavor of some skunk gas in my mouth minutes after hitting it 😋
I was blown away by how beautiful this flower is. There’s no other way to describe the smell on these other than pure sweet tarts. Like, it genuinely smells like a bag of the actual candy, its incredible. Just the right amount of sour, I can’t stop smelling it!
Hits fast and hard out the ball vape. Tastes just like sweet tarts, as well. I was honestly hoping for more sativa effects, considering the lineage of Purple Thai x ATF x Afghani. However, the afghani really shines through, because this feels like a very balanced hybrid. Very euphoric and hard hitting, but super relaxing, absolutely no anxiety, just locked in and chilling hard, feeling great. The cure is perfect, the nugs feel perfectly sticky and vape fantastically out of my ruby twist. Super satisfied with this one!
Strawberry Horchata– Strawberry Horchata is a potent hybrid strain, blending Strawberry Cough with Horchata (Jet Fuel Gelato x Mochi Gelato.) The scent is strong strawberry cream, and the flavor really brings out the gelato again, with a creamy vanilla taste. Absolutely delicious strain.
Nugs are beautifully cured, perfectly sticky and moist, and break up great. Effects are very potent, it really brings out the uplifting effects from the strawberry cough, as well as the relaxing effects of a gelato strain. Just a perfect hybrid for just about any occasion or time of day.
I’ve had the same grinder for about 10 years now. After updating all of my other smoking accessories, I decided it was time to upgrade my grinder game. After seeing a couple recommendations for the Flower Mill, I decided to pull the trigger. I’m so glad I did!
This video of mine sums it up here, and shows how quickly it grinds.
But essentially, this is the best “grinder” I’ve ever bought. I put that in quotes because it’s not truly a grinder, it has no teeth! Instead, it uses a rotating plate and stationary screen to mill your herb, keeping it fluffy and perfectly uniform.
A regular grinder’s teeth just tear up the flower and damage it’s trichomes, while getting clogged up with sticky kief. With the Flower Mill, there are no clogs, and your flower stays potent and flavorful.
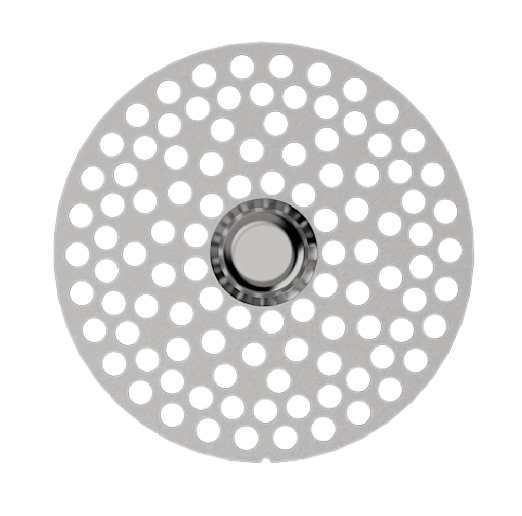
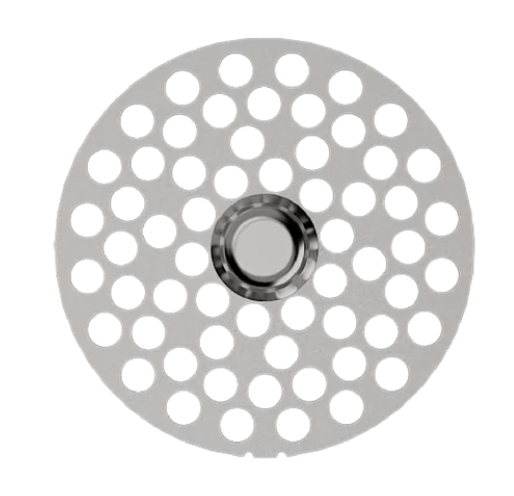
One of the best parts is that you can swap out the milling screen for a total of 5 different grind sizes. The default is 3, here are a few examples of the others;
1 – Extra Fine Grind2 – Fine Grind5 – Extra Coarse Grind
Overall, I’ve been very happy with how the herb comes out in this. It stays so fluffy and airy that you can actually feel the difference in the smoke. With the different size screens, I can have the perfect grind for different vape setups, or just a typical blunt, whatever the occasion calls for.
I couldn’t see myself going back to a regular grinder!
If you grab one, make sure you use code ’10off’ at checkout for 10% off your order, or just click the link here!
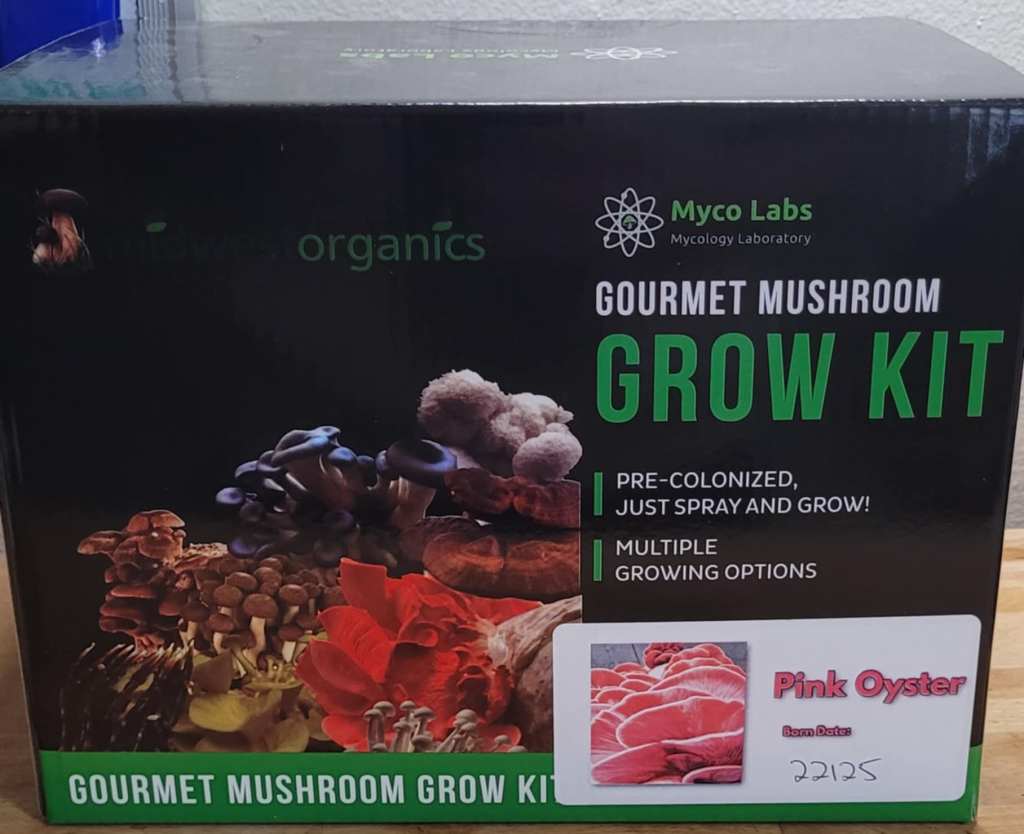
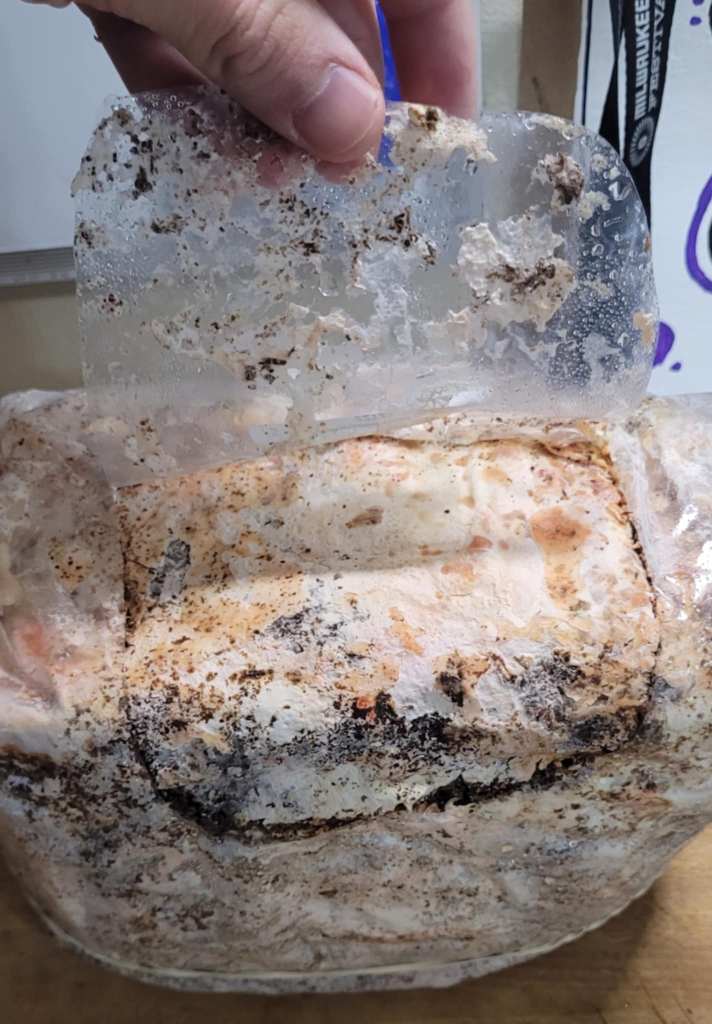
Today, I received my Pink Oyster Grow Kit from Midwest Grow Kits. These little guys grow fast, look beautiful, and taste delicious. I’m going to update this blog daily, documenting my progress with this grow kit from start to finish. Stick around and let’s see what happens! 🍄
This is what comes in the box, along with a flyer containing instructions. It lists 2 different ways that we can grow this out, I’m going with the easier option.
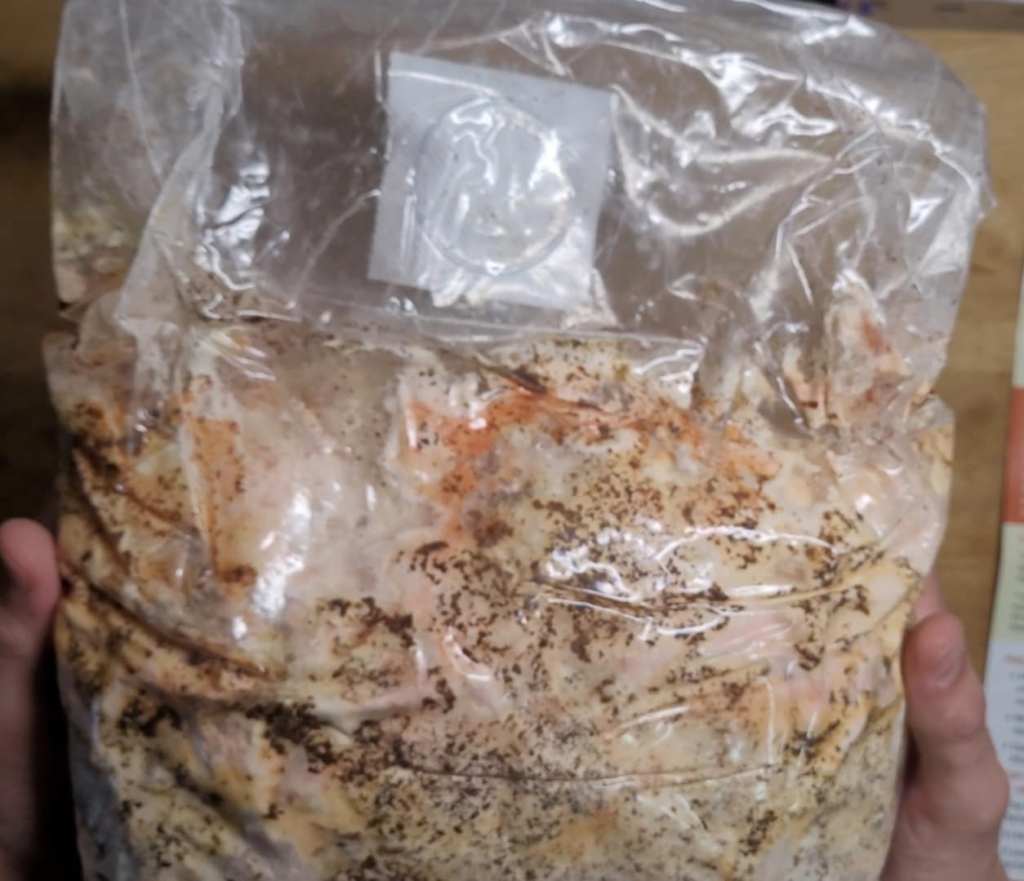
Here’s how the bag looks right out of the box. The bag is completely sealed, except for the white filter at the top, which allows for fresh air exchange. The block inside the bag would have started out brown, but now that it’s fully colonized with mycelium, it’s fully coated in white. There are some orange spots near the top as well, and that’s okay! It’s just a natural growth hormone, produced by the mycelium when it’s ready for mushroom production! It’s a great sign.
Now, I need to give it air in order to trigger mushroom production. To do this, I’m going to cut a large U-shaped flap in the front of the bag, like so:
You want to cut into the mycelium as well, just a little bit. Wakes it up a little!
It needs to be kept in a decently moist environment to really thrive. To do this, I’m going to use the provided water mister to spray the whole bag, and the entire box that the bag came in. Then I will put the whole bag back in the box.
Finally, I’ll take a regular sized plastic bag, spray the inside of it, and put it on top of the entire box, in order to create a humidity-retaining dome. Here’s how it looks now:
And that’s it! I’ll leave it in a spot in my kitchen that gets indirect sunlight, and within 7-10 days, fresh mushrooms should emerge.
Looking for an explanation on the different tiers at LIT Farms? Look no further! Example pictures included.
Essential – Lowest Tier
Grown in either outdoor, greenhouse, or light-dep environments. Occasionally, but more rarely sourced from large commercial indoor farms.
This tier will usually have the least bag appeal & scent.
Great for beginners, budget hunters & old heads looking for that old school sun grown flower. Also great for homemade edibles, oils, etc.
Essential tier flower – GMO
Preferred – Middle Tier
Grown indoor, by various farms.
Expect a more noticeable scent, more pleasing flavor, and better bag appeal. This flower will have noticeably more trichome coverage.
Great for experienced users, looking for a high quality indoor flower to enjoy on a daily basis.
Preferred tier flower – White Truffle
Supreme – Highest Tier
Grown indoor by LIT themselves, or grown in limited batches by smaller craft farms.
Top shelf flower; Very high bag appeal, powerful scent & flavor, and very potent effects. These releases rival any of the highest tier flower from any dispensary or brand.
Great for users with high tolerance, users looking for a luxury craft experience, & connoisseurs.
Supreme tier flower – Black Runtz
It’s explained! Whatever flower you may be looking for, LIT’s got you covered, at unbeatable prices.
Wondering if LIT is legit? Check out my article on that Here.
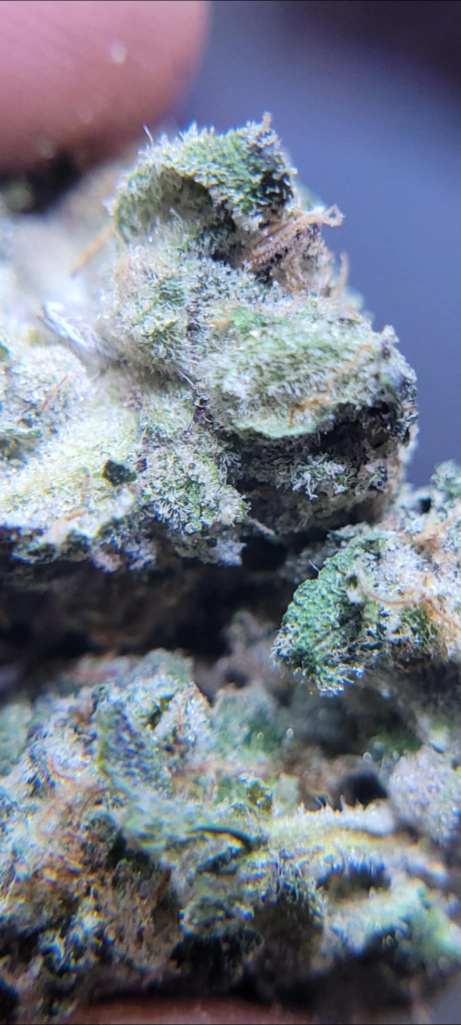
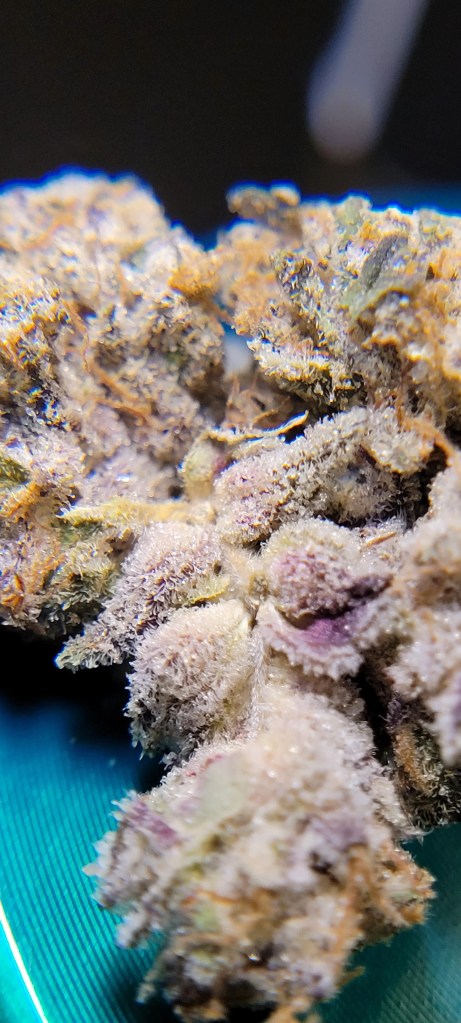
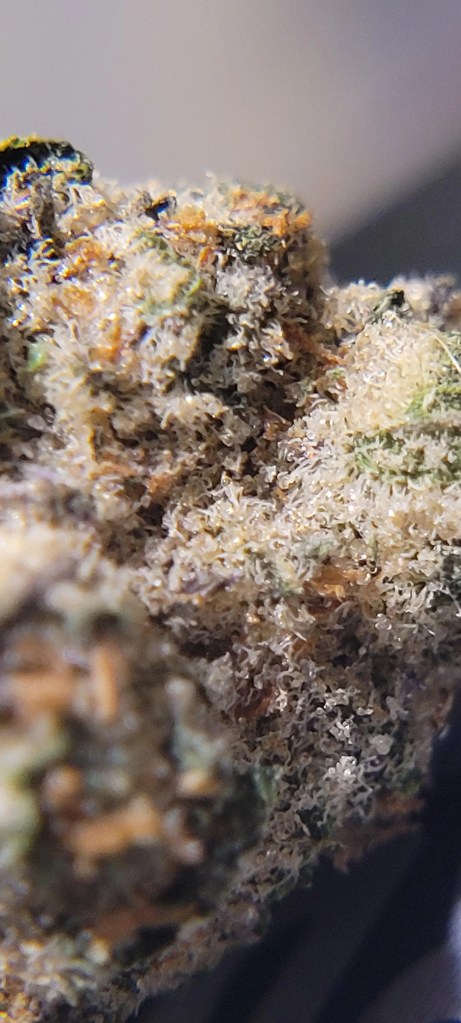
Whenever I get a new strain, one of my favorite things to do is take a whole photoshoot of it. I love using a macro lens for this, as it lets me see the flower in great detail. I really enjoy looking at the trichomes, and making sure there’s no visible mold or anything else that I don’t want to smoke. Here are a few examples of photos that have made people say “How are you taking these pictures?!”
I’ll break down my process for taking these pictures in a few simple steps:
Use a Macro Lens attachment for your phone. I got This Cheap Macro Lens, and I love it. It’s super simple, just snaps right on to your phone camera, and suddenly you can take amazingly close, detailed pictures of almost anything.
Make sure your environment is well-lit. It will be basically impossible to take decent pictures if the lighting in your area isn’t great. I make sure to have my ceiling light on, and I also use This Hand-Held, Rechargable Light to make sure there’s a close light source as well. The sun is also a great option, if available.
Clean your camera and lens attachment. These can easily get smudged, ruining the quality of all your pictures.
Get close to the flower. You want the lens to be about 1-2 millimeters away from your subject. You’ll definitely see when it’s close enough.
Focus, and take a lot of pictures. Always remember to tap your screen to get the object completely in-focus on your camera. In addition, I’ll take a bunch of pictures back to back, while moving the camera ever so slightly, just to make sure I get a bunch of good options to choose from.
Enjoy your new macro photography hobby! Congrats, you’ve officially begun macro photography in the easiest, cheapest way I’ve found. If you’re anything like me, it will spawn an addiction!
First off, I feel that it’s important to explain just a little bit about my background and experience with both cannabis and vaporizers, just so you have an idea of who this review is coming from, and gauge how it may or may not relate to your personal situation.
Vaporizer Experience:
This is my first and only ‘ball’ vape. I have previously owned a portable dry herb vape, the Arizer Solo II. I was not a huge fan of how much time that device took for one session, and how little vapor I got with each hit.
Cannabis Experience:
I’ve been smoking, dabbing and eating weed all day, every day for the past 15 years, with just a few breaks in between. High quality flower and concentrates from California, Michigan, Colorado and everywhere in between. My daily routine can easily involve smoking 3 grams of flower, taking several rosin dabs, and eating 200-500mg of edibles, all before noon. I’m genuinely not saying this to brag, I don’t even think that it is one. Why I’m getting into this will become apparent a little bit later.
My Preconceptions:
When doing my research on what ball vape should be my first, I kept seeing the same phrase mentioned over and over: “It makes your flower hit like a dab!” I was pretty hesitant to believe that one. I figured “they must just have low tolerances, surely it won’t hit me like that, right?”
Wrong!
I was also hesitant to believe that it would be easy to set up. I mean, ball vapes sound complicated as a complete beginner. The concept of going from a lighter, to a heated coil and ruby balls, sounded pretty intimidating.
Also wrong!
First Impressions:
Right out of the box, I could tell it would be easier to get setup than I had thought. I bought mine from VgoodieZ as a kit, so it came entirely assembled, just had to plug it in, let it “heat soak” for 5 minutes according to the instructions, then it was good to go! The bowl it came with fit right into the bong I had already owned, and was ready to pack and go. (After I cleaned it and my bong with isopropyl alcohol, just to be clean.)
It was very simple, and I hardly even needed the instructions to figure out how to work it. It’s pretty intuitive to just pack the bowl, put the metal coil on it, and rip some clouds!
And let me tell you, this thing RIPS! It gives me just as much cloud-action as this same bong did with combustion, except the bowls actually last longer! I get several huge hits out of the same amount of flower as one combusted bong hit. And the best part is, it truly feels like a dabbing experience. The people who had said that were so exactly right! Each hit is a super flavorful, potent burst of terpenes and flavors, that hit you immediately right between the eyes, just like a dab would. Due to my tolerance, I thought that I would disagree with this, but I was very wrong, it really is just like dabbing.
In the first few days, I was under the impression that lower temps would be best for smooth vapor, so I was hitting it at about 500f, and found a lot of my strains to be relatively harsh at that temperature. I brushed it off, figuring I just needed to get used to the new device.
Thoughts After One Month:
A month in, and I’m still loving this device. I haven’t even wanted to try combusting my green again, it just feels like that would be a waste, and taste terrible as well. I’ve adjusted to using the device at 550, the higher temperature actually makes for a smoother hit.
After running this daily for a month, probably thousands of bowls in by this point, I can tell you that it STILL hits me like a dab. Tolerance buildup hasn’t been much of a thing at all, I’m still getting absolutely ripped off this thing, despite being pretty used to it at this point. I consistently feel like I used to as a beginner stoner, getting as high as I did years and years ago. It’s been amazing!
Another benefit is in my lungs. As a daily smoker for so long, my lungs were really feeling it, I had a smokers cough and everything. Since getting used to the switch, I haven’t had any cough at all.
I also smell better, in addition to all my clothes and my whole house as well. When using the Ruby Twist, the room will still smell, but it seems to go away entirely in about 15 minutes. When I used to smoke out my window, I’d be able to smell it hours later.
Since making the switch, I no longer need ash trays at all. Instead, I fill a jar with my already-vaped-bud, and just mix it in to ice cream later on. Since it’s been ‘decarbed’ by the vape process already, it’s ready to eat and be absorbed in the body! No need to cook it in to edibles, like with traditional flower. It takes longer to kick in than a regular edible, but it lasts a long time and hits pretty hard.
Overall Thoughts:
I’m absolutely considering this the best purchase I’ve made in years.
1. It’s definitely healthier. The older I get, the more important that is to me.
2. It’s just fun! After smoking for years, it’s great to have an option that’s not only hard hitting, but just fresh and new.
3. It saves weed. Weed is very possibly one of my biggest expenses. Don’t get me wrong, I can afford it, but it’s always nice to cut costs down on something you go through a lot of!
In conclusion, the only thing that I regret is taking so long to pull the trigger on this. I’d been reading about ball vapes, and how great they are, for well over a year before making this leap. That’s a whole year that I could’ve been enjoying weed more, while harming my body less.
Don’t be like me! Grab your Ruby Twist Kit here at VgoodieZ, I don’t see how anyone could regret it. I used code ‘Buddy5’ at checkout, to bring the whole kit down to just $190 in total, shipped to my door and everything.
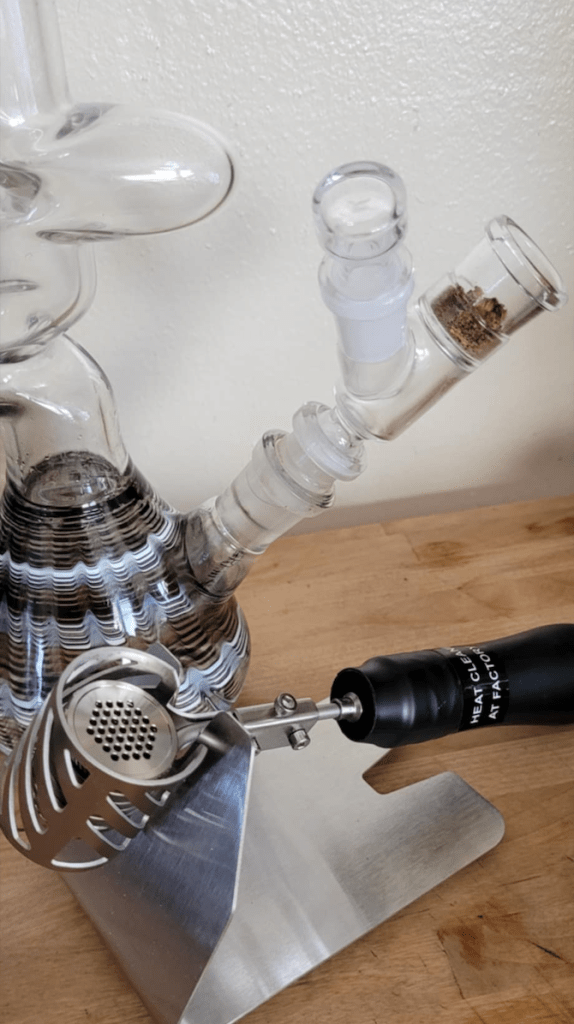
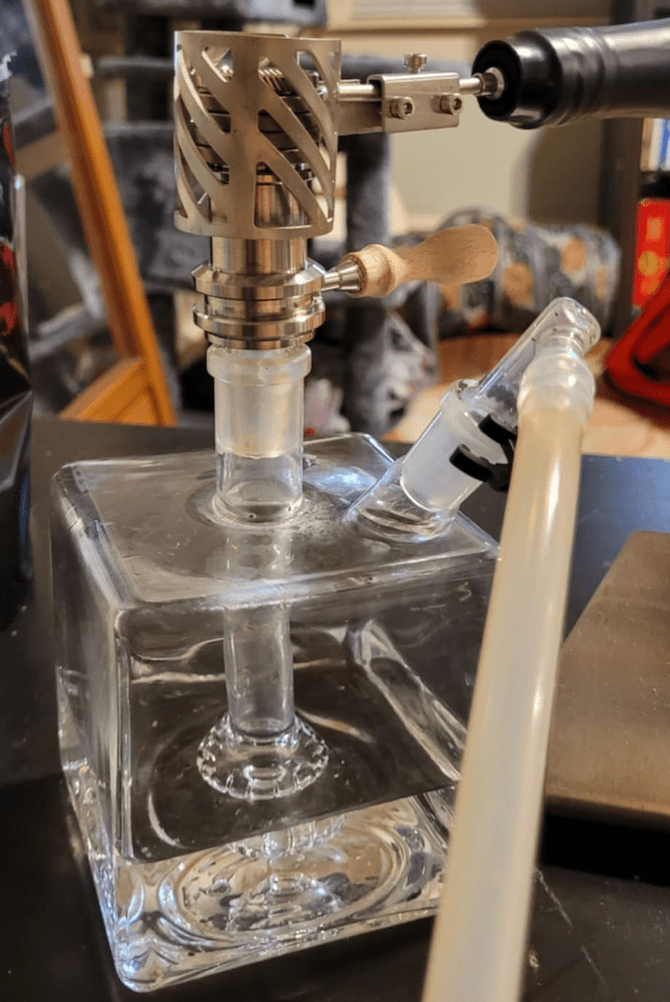
Addition: Later on, I bought the ‘Cell’ water pipe that’s made to be used with these devices. It’s a very nice addition to my collection, and the Ruby Twist sits perfectly on top of it, letting me use it hands free, a little bit. I love it, and the showerhead percolator inside of it. However, if I could go back in time, I would buy the bigger ‘Cell Mega’ for a little bit more money, just so it would sit with more stability on my counter. It’s not unstable, but I’ve almost knocked it over a couple times. I don’t think the big guy would have budged! If you’re just buying a water pipe attachment, you can use code ‘Buddy10’ at checkout for 10% off.
Differen’t options you could buy, and the attached discount codes that I used. You could just buy the ruby twist bundle and use it with any bong you have at home, or you could buy the bundle with the glass included, or just the glass itself if you need. You DO NOT need all of these items to use the Ruby Twist.