I’ve had the same grinder for about 10 years now. After updating all of my other smoking accessories, I decided it was time to upgrade my grinder game. After seeing a couple recommendations for the Flower Mill, I decided to pull the trigger. I’m so glad I did!
This video of mine sums it up here, and shows how quickly it grinds.
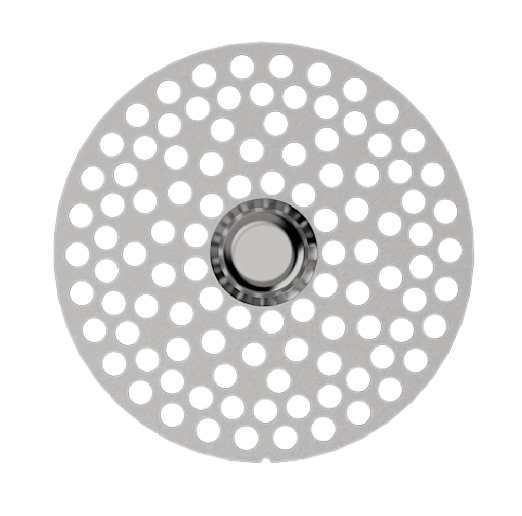
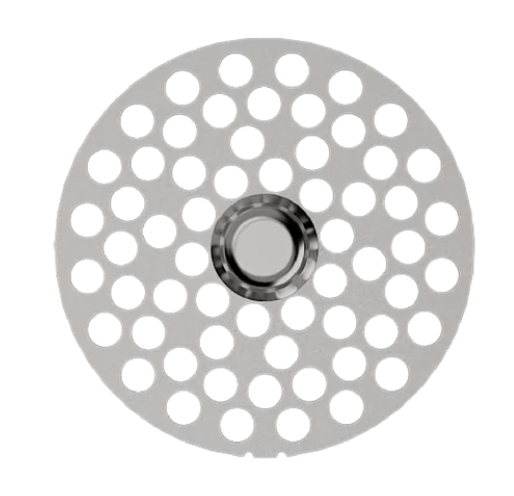
But essentially, this is the best “grinder” I’ve ever bought. I put that in quotes because it’s not truly a grinder, it has no teeth! Instead, it uses a rotating plate and stationary screen to mill your herb, keeping it fluffy and perfectly uniform.
A regular grinder’s teeth just tear up the flower and damage it’s trichomes, while getting clogged up with sticky kief. With the Flower Mill, there are no clogs, and your flower stays potent and flavorful.
One of the best parts is that you can swap out the milling screen for a total of 5 different grind sizes. The default is 3, here are a few examples of the others;
1 – Extra Fine Grind2 – Fine Grind5 – Extra Coarse Grind
Overall, I’ve been very happy with how the herb comes out in this. It stays so fluffy and airy that you can actually feel the difference in the smoke. With the different size screens, I can have the perfect grind for different vape setups, or just a typical blunt, whatever the occasion calls for.
I couldn’t see myself going back to a regular grinder!
If you grab one, make sure you use code ’10off’ at checkout for 10% off your order, or just click the link here!
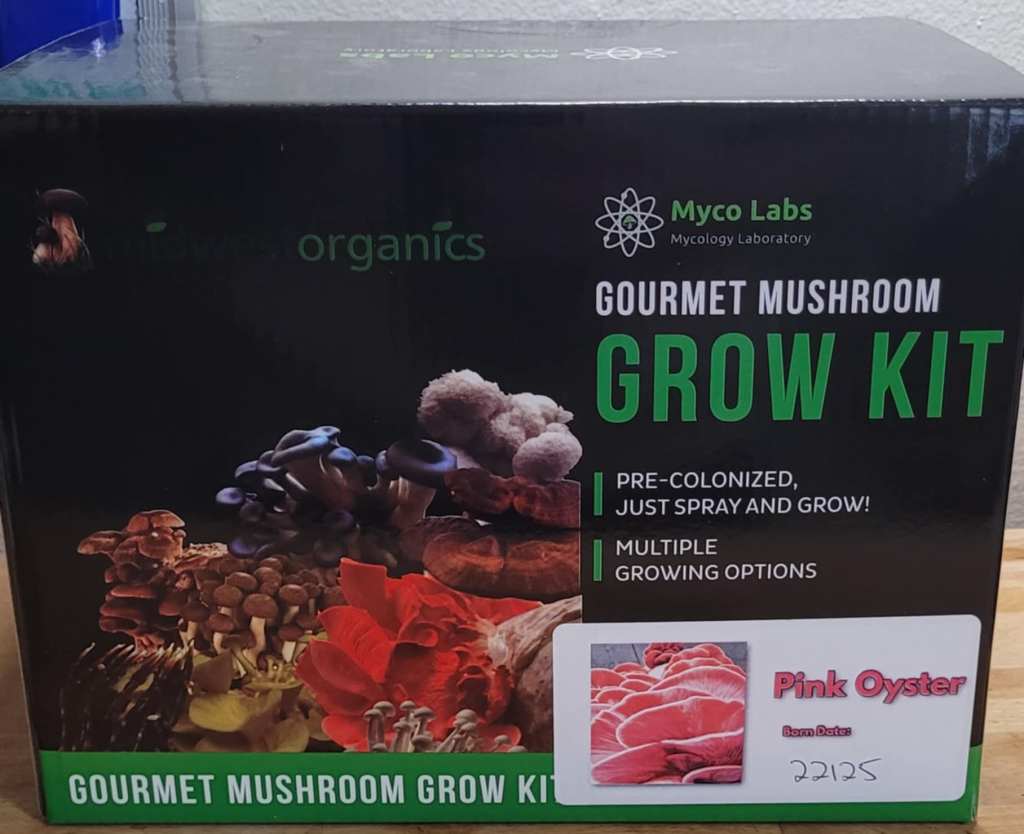
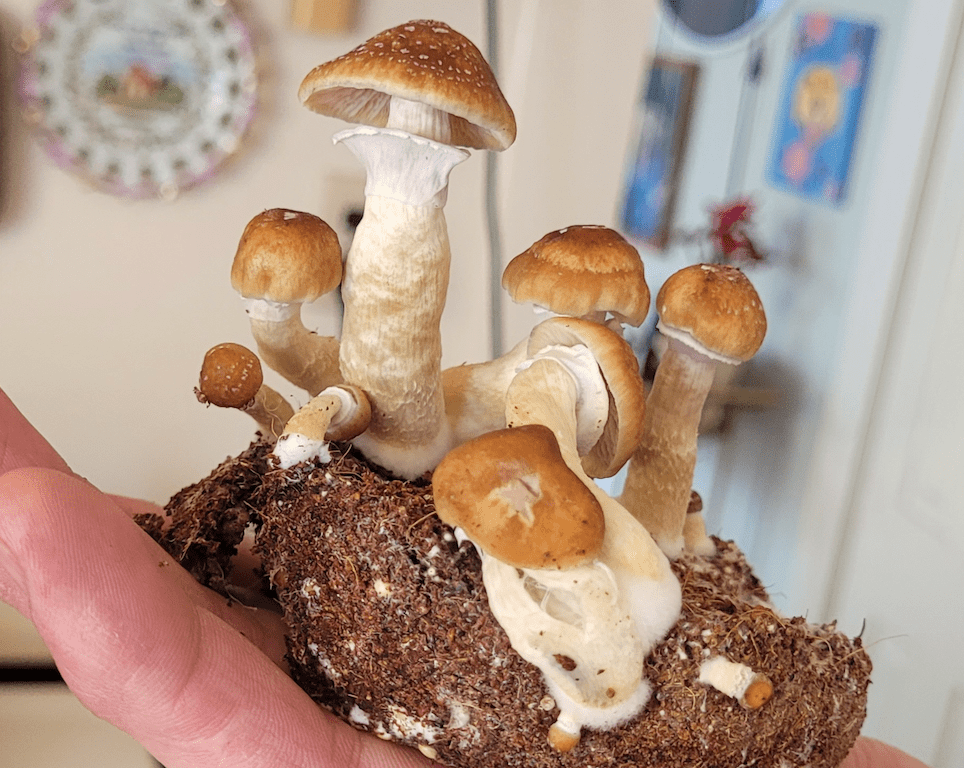
Today, I received my Pink Oyster Grow Kit from Midwest Grow Kits. These little guys grow fast, look beautiful, and taste delicious. I’m going to update this blog daily, documenting my progress with this grow kit from start to finish. Stick around and let’s see what happens! 🍄
This is what comes in the box, along with a flyer containing instructions. It lists 2 different ways that we can grow this out, I’m going with the easier option.
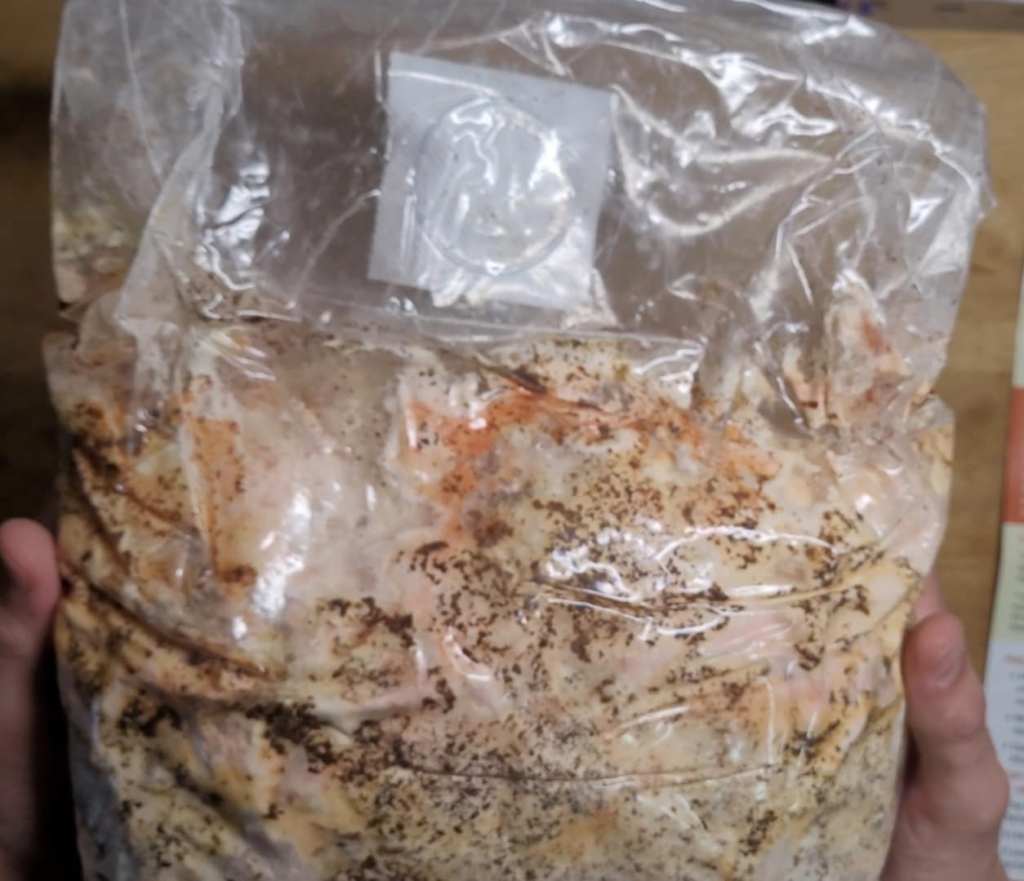
Here’s how the bag looks right out of the box. The bag is completely sealed, except for the white filter at the top, which allows for fresh air exchange. The block inside the bag would have started out brown, but now that it’s fully colonized with mycelium, it’s fully coated in white. There are some orange spots near the top as well, and that’s okay! It’s just a natural growth hormone, produced by the mycelium when it’s ready for mushroom production! It’s a great sign.
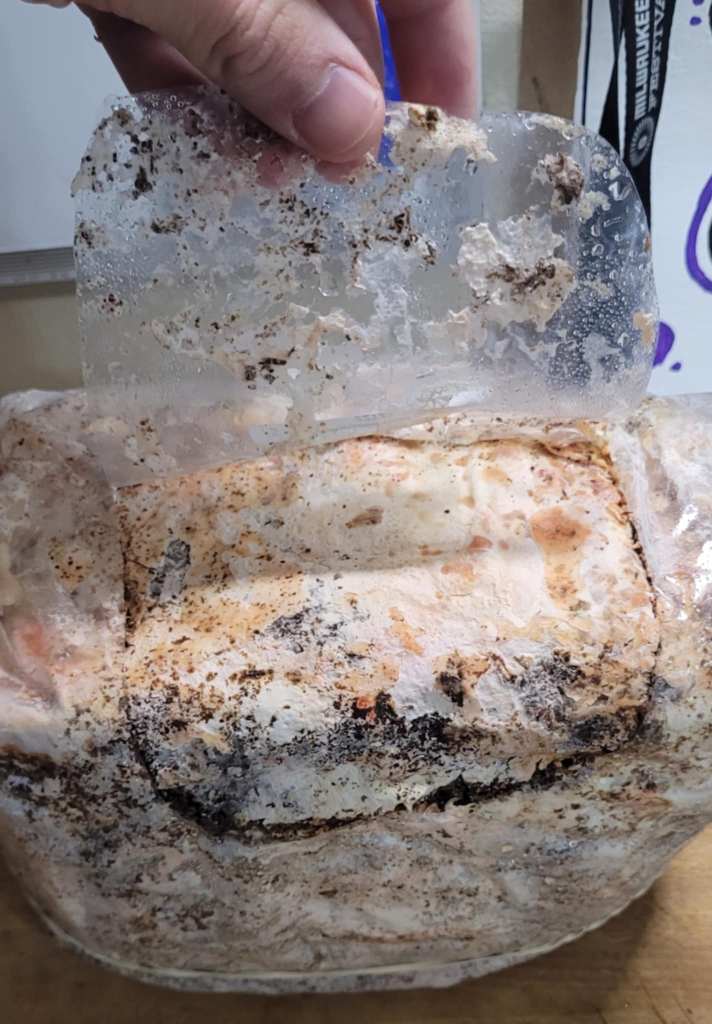
Now, I need to give it air in order to trigger mushroom production. To do this, I’m going to cut a large U-shaped flap in the front of the bag, like so:
You want to cut into the mycelium as well, just a little bit. Wakes it up a little!
It needs to be kept in a decently moist environment to really thrive. To do this, I’m going to use the provided water mister to spray the whole bag, and the entire box that the bag came in. Then I will put the whole bag back in the box.
Finally, I’ll take a regular sized plastic bag, spray the inside of it, and put it on top of the entire box, in order to create a humidity-retaining dome. Here’s how it looks now:
And that’s it! I’ll leave it in a spot in my kitchen that gets indirect sunlight, and within 7-10 days, fresh mushrooms should emerge.
Looking for an explanation on the different tiers at LIT Farms? Look no further! Example pictures included.
Essential – Lowest Tier
Grown in either outdoor, greenhouse, or light-dep environments. Occasionally, but more rarely sourced from large commercial indoor farms.
This tier will usually have the least bag appeal & scent.
Great for beginners, budget hunters & old heads looking for that old school sun grown flower. Also great for homemade edibles, oils, etc.
Essential tier flower – GMO
Preferred – Middle Tier
Grown indoor, by various farms.
Expect a more noticeable scent, more pleasing flavor, and better bag appeal. This flower will have noticeably more trichome coverage.
Great for experienced users, looking for a high quality indoor flower to enjoy on a daily basis.
Preferred tier flower – White Truffle
Supreme – Highest Tier
Grown indoor by LIT themselves, or grown in limited batches by smaller craft farms.
Top shelf flower; Very high bag appeal, powerful scent & flavor, and very potent effects. These releases rival any of the highest tier flower from any dispensary or brand.
Great for users with high tolerance, users looking for a luxury craft experience, & connoisseurs.
Supreme tier flower – Black Runtz
It’s explained! Whatever flower you may be looking for, LIT’s got you covered, at unbeatable prices.
Wondering if LIT is legit? Check out my article on that Here.
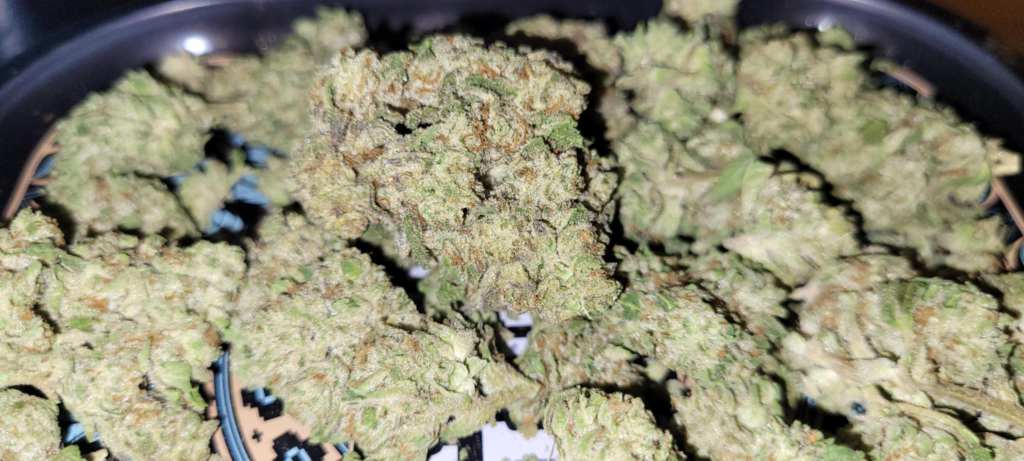
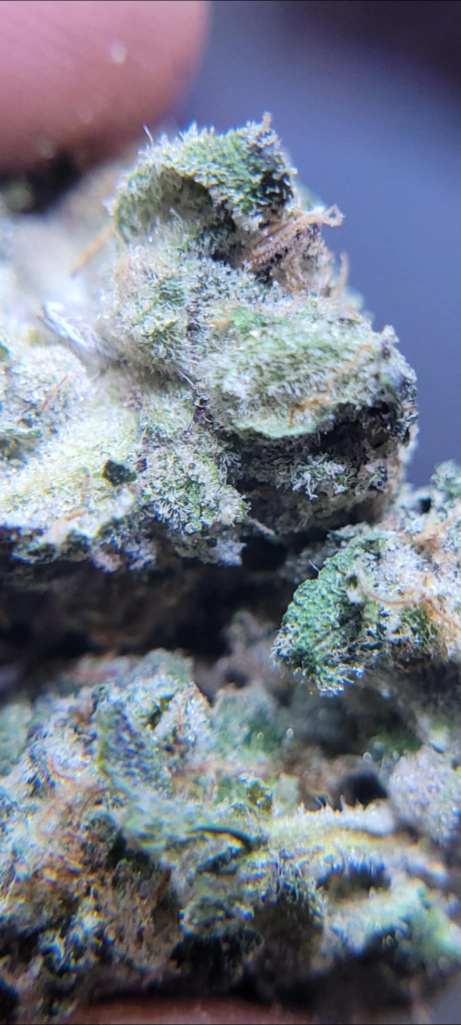
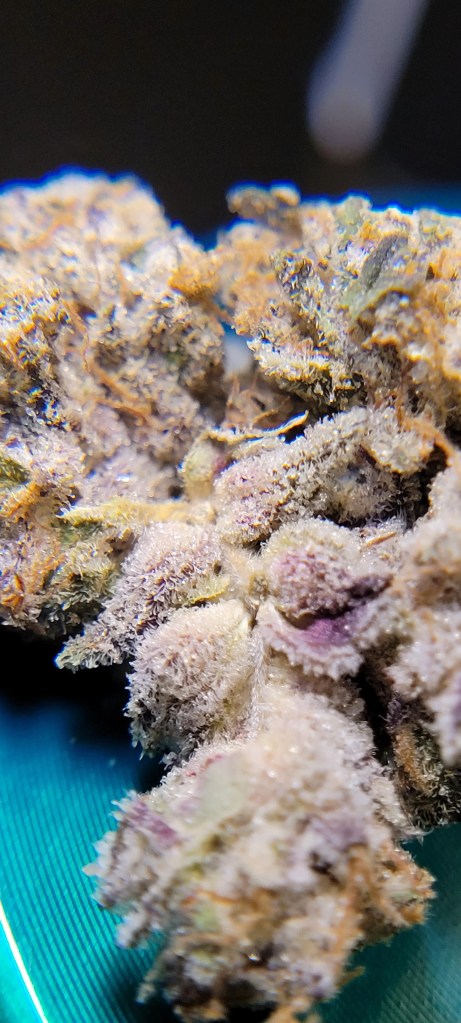
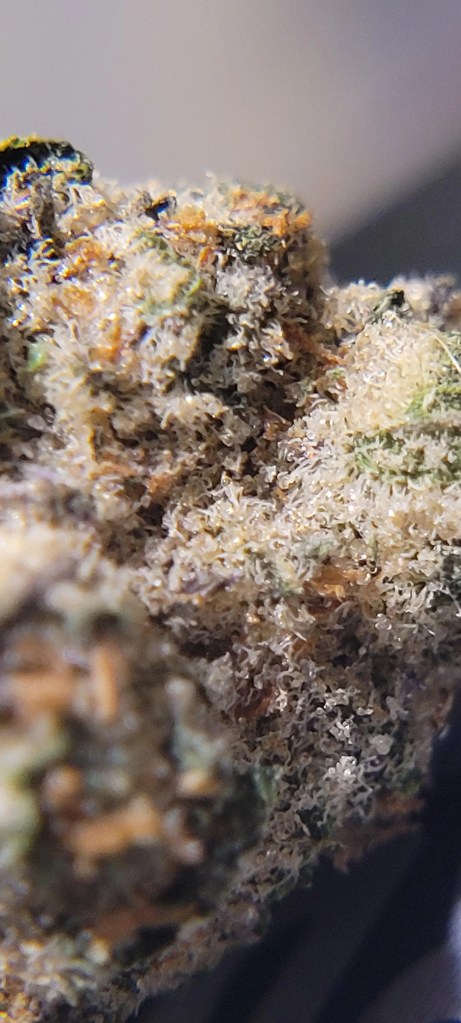
Whenever I get a new strain, one of my favorite things to do is take a whole photoshoot of it. I love using a macro lens for this, as it lets me see the flower in great detail. I really enjoy looking at the trichomes, and making sure there’s no visible mold or anything else that I don’t want to smoke. Here are a few examples of photos that have made people say “How are you taking these pictures?!”
I’ll break down my process for taking these pictures in a few simple steps:
Use a Macro Lens attachment for your phone. I got This Cheap Macro Lens, and I love it. It’s super simple, just snaps right on to your phone camera, and suddenly you can take amazingly close, detailed pictures of almost anything.
Make sure your environment is well-lit. It will be basically impossible to take decent pictures if the lighting in your area isn’t great. I make sure to have my ceiling light on, and I also use This Hand-Held, Rechargable Light to make sure there’s a close light source as well. The sun is also a great option, if available.
Clean your camera and lens attachment. These can easily get smudged, ruining the quality of all your pictures.
Get close to the flower. You want the lens to be about 1-2 millimeters away from your subject. You’ll definitely see when it’s close enough.
Focus, and take a lot of pictures. Always remember to tap your screen to get the object completely in-focus on your camera. In addition, I’ll take a bunch of pictures back to back, while moving the camera ever so slightly, just to make sure I get a bunch of good options to choose from.
Enjoy your new macro photography hobby! Congrats, you’ve officially begun macro photography in the easiest, cheapest way I’ve found. If you’re anything like me, it will spawn an addiction!
First off, I feel that it’s important to explain just a little bit about my background and experience with both cannabis and vaporizers, just so you have an idea of who this review is coming from, and gauge how it may or may not relate to your personal situation.
Vaporizer Experience:
This is my first and only ‘ball’ vape. I have previously owned a portable dry herb vape, the Arizer Solo II. I was not a huge fan of how much time that device took for one session, and how little vapor I got with each hit.
Cannabis Experience:
I’ve been smoking, dabbing and eating weed all day, every day for the past 15 years, with just a few breaks in between. High quality flower and concentrates from California, Michigan, Colorado and everywhere in between. My daily routine can easily involve smoking 3 grams of flower, taking several rosin dabs, and eating 200-500mg of edibles, all before noon. I’m genuinely not saying this to brag, I don’t even think that it is one. Why I’m getting into this will become apparent a little bit later.
My Preconceptions:
When doing my research on what ball vape should be my first, I kept seeing the same phrase mentioned over and over: “It makes your flower hit like a dab!” I was pretty hesitant to believe that one. I figured “they must just have low tolerances, surely it won’t hit me like that, right?”
Wrong!
I was also hesitant to believe that it would be easy to set up. I mean, ball vapes sound complicated as a complete beginner. The concept of going from a lighter, to a heated coil and ruby balls, sounded pretty intimidating.
Also wrong!
First Impressions:
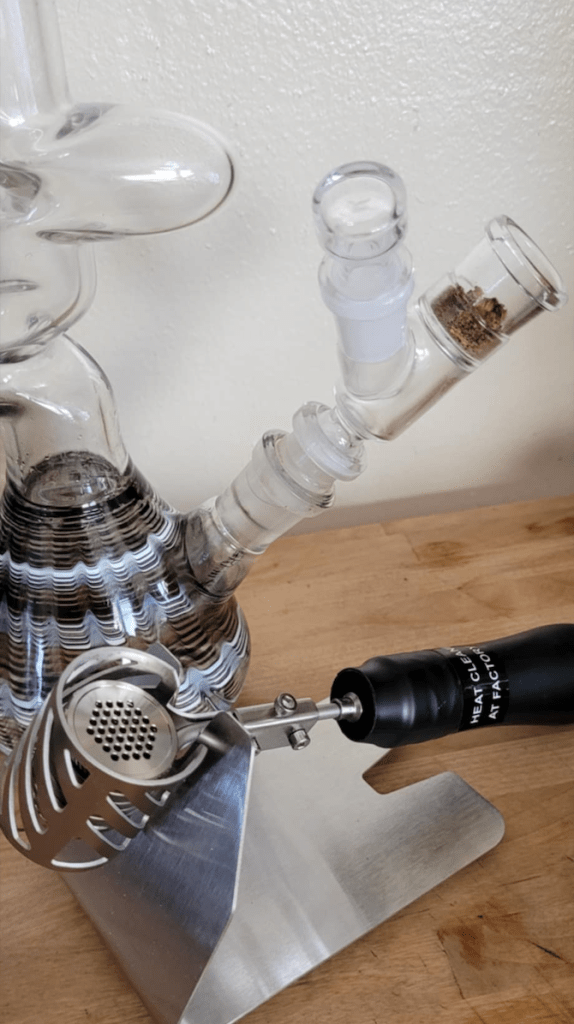
Right out of the box, I could tell it would be easier to get setup than I had thought. I bought mine from VgoodieZ as a kit, so it came entirely assembled, just had to plug it in, let it “heat soak” for 5 minutes according to the instructions, then it was good to go! The bowl it came with fit right into the bong I had already owned, and was ready to pack and go. (After I cleaned it and my bong with isopropyl alcohol, just to be clean.)
It was very simple, and I hardly even needed the instructions to figure out how to work it. It’s pretty intuitive to just pack the bowl, put the metal coil on it, and rip some clouds!
And let me tell you, this thing RIPS! It gives me just as much cloud-action as this same bong did with combustion, except the bowls actually last longer! I get several huge hits out of the same amount of flower as one combusted bong hit. And the best part is, it truly feels like a dabbing experience. The people who had said that were so exactly right! Each hit is a super flavorful, potent burst of terpenes and flavors, that hit you immediately right between the eyes, just like a dab would. Due to my tolerance, I thought that I would disagree with this, but I was very wrong, it really is just like dabbing.
In the first few days, I was under the impression that lower temps would be best for smooth vapor, so I was hitting it at about 500f, and found a lot of my strains to be relatively harsh at that temperature. I brushed it off, figuring I just needed to get used to the new device.
Thoughts After One Month:
A month in, and I’m still loving this device. I haven’t even wanted to try combusting my green again, it just feels like that would be a waste, and taste terrible as well. I’ve adjusted to using the device at 550, the higher temperature actually makes for a smoother hit.
After running this daily for a month, probably thousands of bowls in by this point, I can tell you that it STILL hits me like a dab. Tolerance buildup hasn’t been much of a thing at all, I’m still getting absolutely ripped off this thing, despite being pretty used to it at this point. I consistently feel like I used to as a beginner stoner, getting as high as I did years and years ago. It’s been amazing!
Another benefit is in my lungs. As a daily smoker for so long, my lungs were really feeling it, I had a smokers cough and everything. Since getting used to the switch, I haven’t had any cough at all.
I also smell better, in addition to all my clothes and my whole house as well. When using the Ruby Twist, the room will still smell, but it seems to go away entirely in about 15 minutes. When I used to smoke out my window, I’d be able to smell it hours later.
Since making the switch, I no longer need ash trays at all. Instead, I fill a jar with my already-vaped-bud, and just mix it in to ice cream later on. Since it’s been ‘decarbed’ by the vape process already, it’s ready to eat and be absorbed in the body! No need to cook it in to edibles, like with traditional flower. It takes longer to kick in than a regular edible, but it lasts a long time and hits pretty hard.
Overall Thoughts:
I’m absolutely considering this the best purchase I’ve made in years.
1. It’s definitely healthier. The older I get, the more important that is to me.
2. It’s just fun! After smoking for years, it’s great to have an option that’s not only hard hitting, but just fresh and new.
3. It saves weed. Weed is very possibly one of my biggest expenses. Don’t get me wrong, I can afford it, but it’s always nice to cut costs down on something you go through a lot of!
In conclusion, the only thing that I regret is taking so long to pull the trigger on this. I’d been reading about ball vapes, and how great they are, for well over a year before making this leap. That’s a whole year that I could’ve been enjoying weed more, while harming my body less.
Don’t be like me! Grab your Ruby Twist Kit here at VgoodieZ, I don’t see how anyone could regret it. I used code ‘Buddy5’ at checkout, to bring the whole kit down to just $190 in total, shipped to my door and everything.
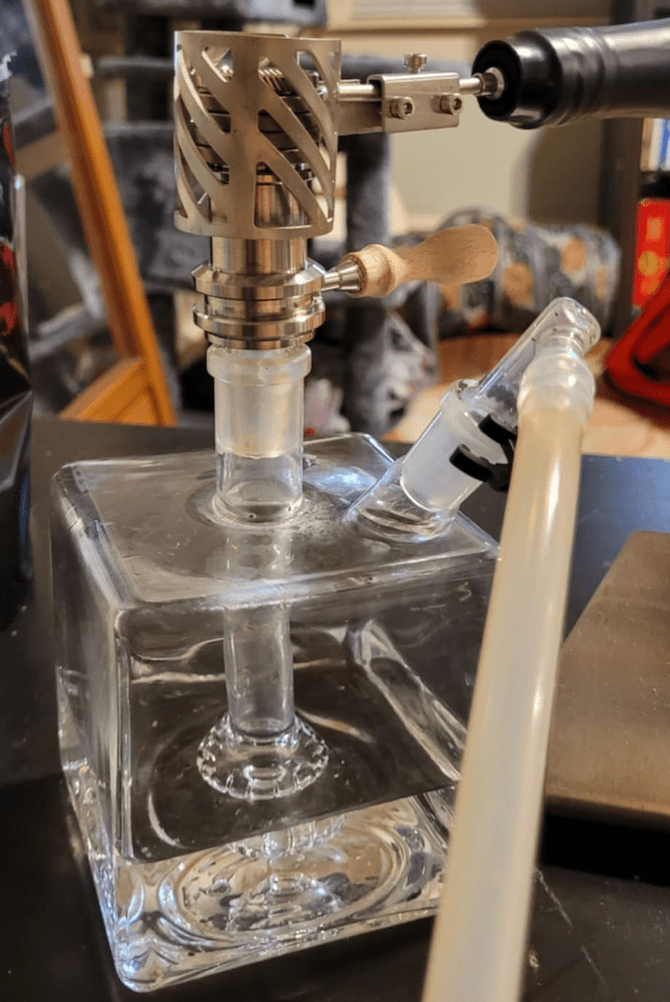
Addition: Later on, I bought the ‘Cell’ water pipe that’s made to be used with these devices. It’s a very nice addition to my collection, and the Ruby Twist sits perfectly on top of it, letting me use it hands free, a little bit. I love it, and the showerhead percolator inside of it. However, if I could go back in time, I would buy the bigger ‘Cell Mega’ for a little bit more money, just so it would sit with more stability on my counter. It’s not unstable, but I’ve almost knocked it over a couple times. I don’t think the big guy would have budged! If you’re just buying a water pipe attachment, you can use code ‘Buddy10’ at checkout for 10% off.
Differen’t options you could buy, and the attached discount codes that I used. You could just buy the ruby twist bundle and use it with any bong you have at home, or you could buy the bundle with the glass included, or just the glass itself if you need. You DO NOT need all of these items to use the Ruby Twist.
Egg cartons in grocery stores near me are currently $12/dozen.
I don’t know about you, but at that point, I can’t afford to eat them at all. That sucks, because my girlfriend is vegetarian. We go through a ton of eggs!
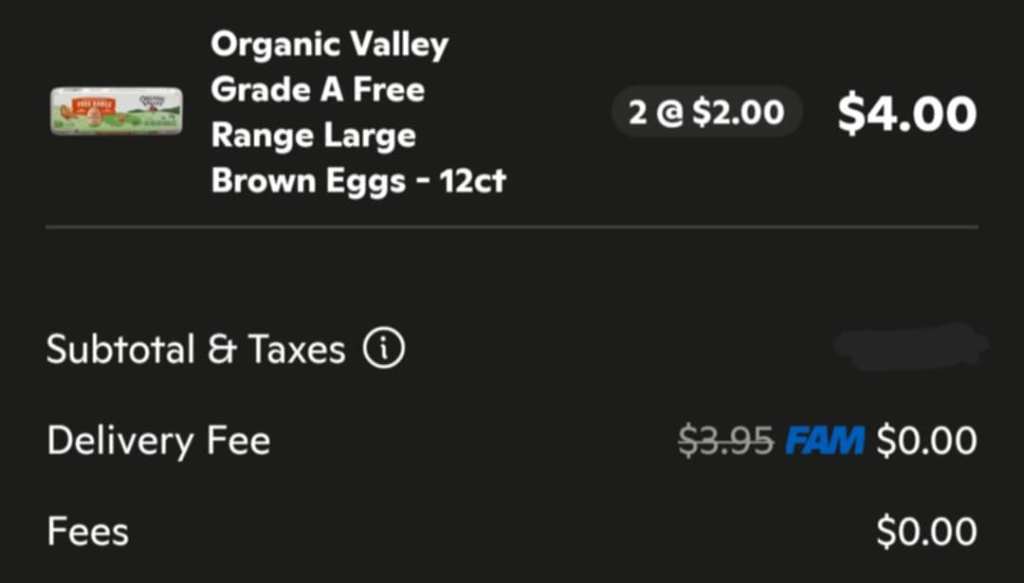
Luckily, I found a method to keep getting them at a great price ($2/carton!) in 2025, and you should be able to use it as well.
I signed up for a free trial for FAM, giving me access to $2/dozen eggs, and no fees, minus a few dollars tip.
Using this, I can get a total of 48 eggs for just $8 + a couple dollars tip for my driver.
48 eggs would cost $48 at my local grocery stores at the moment. So this has been a lifesaver!
And I know, you have to worry about the free trial ending and being charged for the service. But here’s the thing, it’s only $8/month. At the rate we go through eggs in this house, that’s MORE than worthwhile at the moment.
And possibly the best part, This Link gave me half off my first order, as well.
That’s all there is to it! Until they change up this deal, or until prices in stores are lower, I’ll definitely be using GoPuff for all my grocery needs.
In the final days of December 2023, I had a very sudden realization: I wasn’t happy with who I was. Having dealt with depression and anxiety for about 20 years by this point, I was no stranger to this feeling, but I was fed up. I never wanted to go out, be with people, go to work, I never really wanted to do anything. I would suck it up and force myself to do things sometimes, but it was harder than it should have been. All I wanted to do was curl up in my bed and hide from the world, all the time. I was never even sure what I was hiding from, I just knew I didn’t enjoy much, and I was sick of it. I had to make a change.
This wasn’t my first time trying to make a change. I’ve tried all the classics, like regular exercise, healthy diet and talk therapy. These all helped me immensely to become the person I am today, but I still had the lingering feeling that just wouldn’t go away. I just didn’t feel like I was a part of, or had a place in, this world. I had heard of people having success with mushrooms, so I started to look into that option. It made me nervous to even think about, but it made me more nervous to think about continuing to live without a major change. And besides, I had tried shrooms a couple times in my younger years, how bad could this be? I decided I wanted to try this option, but this left me with one question: Where would I get shrooms?
Apparently, the world had heard my shouts into the void, and decided to give me a little tease. On December 31, 2023, I went into work and ran into a coworker I hadn’t seen since before the holidays. He pulled me aside, saying he had a little gift he’d been waiting to give me, and pulled out a small jar filled with shrooms, about 2 grams total. He handed it to me, explaining how his friend had grown them, and given them out as Christmas presents. I was blessed enough to receive some as well, and my journey truly began.
That night, New Years Eve, my girlfriend and I split the mushrooms I’d been given, and spent time listening to music, painting, and finally, watching the ball drop. For the first time in years, I felt at peace. Like a deep fog had been lifted from my mind, and I could just BE. Be present, be mindful, be myself, be part of the world, be part of the universe. I could finally live and breathe without the weight of depression on my shoulders, for the first time in years. We had a magical night together, and I was excited for 2024.
This wild coincidence felt like some kind of divine timing, like the universe telling me that I was right, this was the path that I should be taking. My issues weren’t quite solved yet, though. After all, I didn’t actually have a source for more mushrooms, this was a one time thing.
One thing my coworker mentioned stuck with me though, his friend grew them? How? At the time, I had no clue that someone could just do that! Obviously mushrooms grow from somewhere, but the concept of just growing them at home was brand new to me.
So, I found myself a mushroom grow guide on reddit, and began trying to learn the entire process. This guide that I found was very detailed, and I mean DETAILED. It had so much information, that I was completely overwhelmed. It seemed impossible, I just didn’t think I could do it. Over the next couple weeks, I spent hours reading and re-reading the guide, slowly getting comfortable, but trying to make sure I had a full grasp on it. I had many conversations with people on the forum, and asked many questions, sometimes getting different answers. Every grower has their own technique, it seems!
2-3 weeks of constant googling later, and I felt prepared. I finally had all the steps memorized, knew what I needed, and knew where to get it all, for the best prices even. I bit the bullet, nervous that I may have just wasted $150, but excited to try out a new hobby. A few days later it all arrived, and it was finally time to start the process.
2 months later, I had my first full harvest, and a head full of new knowledge and amazement. The main thing I had learned, was that the whole process was actually SUPER easy! I had massively over prepared, worried about nothing, and even spent a little bit more money than I really needed to. It was so easy, that the hardest part was just having patience. Once I had all the materials, I only had to do about 2 hours of work, and 2 months of just waiting for things to happen. It was so easy, that I wrote the simplified guide I linked above, just to help other people in the same position I was in.
Now that my harvest was done and dried, I found myself with 2 ounces of product. This would have cost me somewhere around $4-500 from less legal sources, yet I had only put in about $150. I was thrilled! This was so much more than enough to begin my experiments, enough to last me years! So I began my journey. I put myself on a schedule of taking 0.2 grams, every 3 days.
On those days, I’d come home from work and take my 0.2 grams. I’d put on some music, and begin journaling about myself, my feelings, the ways I’d been living, the things I was sick of, everything. Just analyzing my entire life, and allowing myself to be vulnerable and open with, well, myself. And it felt great, every time. I wasn’t necessarily having grandiose, life changing epiphanies or anything, but I could feel my thought patterns somehow healing for the better. The best way I can think to put it, is like this: If my mind was a business, I was just the manager, lost in the daily grind and operations of keeping things afloat. But when I took my mushroom micro dose, I was a consultant, brought in to look around and optimize workflow.
After each time, I’d feel a decent amount better, but I wasn’t having any big “aha!” Moments, like I had expected. But after about a month of continuing this, I realized that I was indeed changing. I was spending less time in my bed, hiding from the world. I found myself waking up excited to get started on some new project, or even go some place, like the thrift store or grocery store. While I used to think of these tasks as draining chores, I suddenly found myself with a brand new perspective, happy to be around others and taking care of myself.
A few more months of this, and I realize I can hold conversations without second guessing my words. I realize I can just leave my house and go to the store, without even a second thought. No more hyping myself up to do a quick grocery run, no more rehearsing my order in line at the coffee shop. I was finally living the way I always imagined regular, healthy people do, the way my depression had always stopped me from living. At long last, I became a part of this world again, and I have mushrooms to thank for this transformation. There’s no doubt in my mind that this was the best thing I have ever done for myself, and the effects have been long-lasting.
Mushrooms gave me my life back. Thanks for reading my story, I hope it helps someone out there achieve the same results I had.
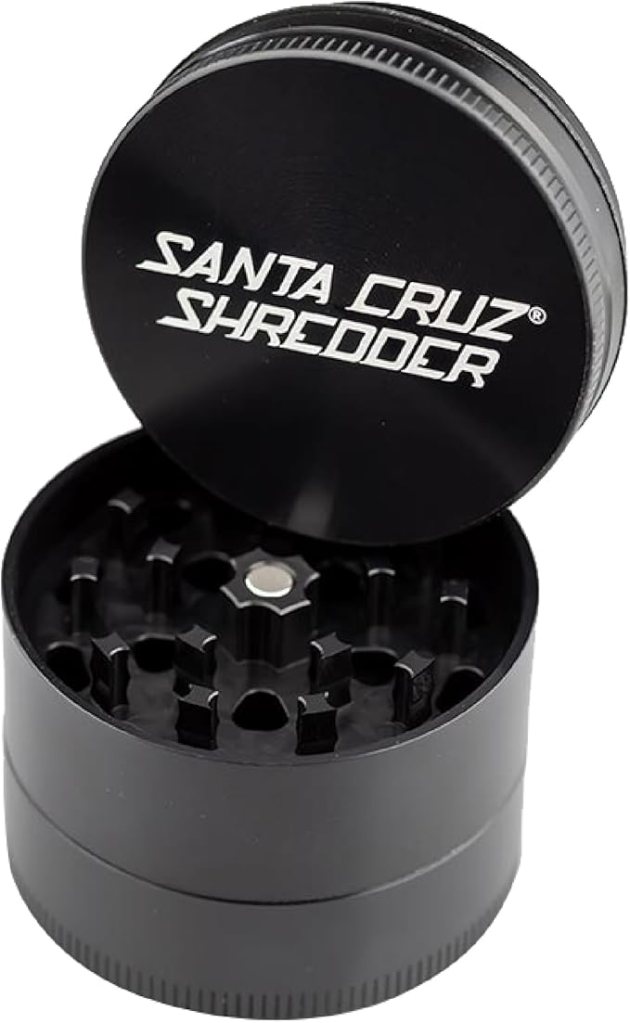
As weed becomes more legal, Amazon becomes much more willing to deliver us our products! Here are some of the highest quality options of the stoner essentials, delivered with speed that only Amazon can provide!
Grinder – Santa Cruz Shredder – One of the highest rated grinders for the past several decades, I’m not sure it’s possible to beat the quality on this one, especially not in this price range. Only $60 for a high powered grinder that will last you the rest of your smoking career.
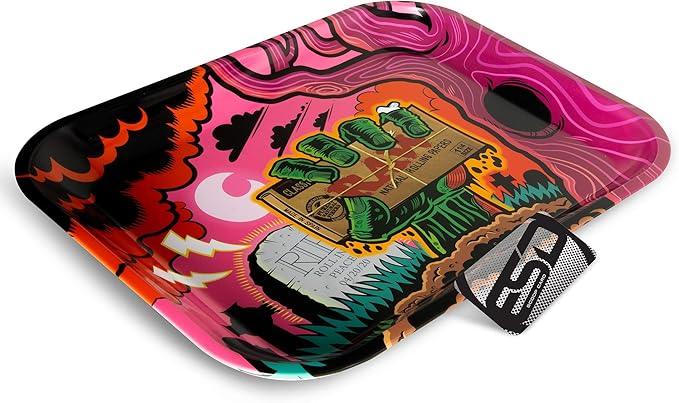
Raw Rolling Tray – Again, name brand, durable, will definitely last you forever. And one of the coolest designs I could find on amazon, personally. I’ve been using this one for 4 years now myself. It’s still functioning perfectly! Just $12.
So, you’ve been smoking for a while now. You’re getting pretty used to the effects you’ve been feeling. Maybe even.. too used to them? Or maybe you just can’t partake right now for any number of other reasons.
If you’ve found this page, I’m assuming you’ve already realized what point you’re at, and what you need to do about it. You may need a tolerance break!
Luckily, taking a tolerance break doesn’t have to be as hard as it seems! Just about every seasoned stoner has been there. It’s all in your mindset and perspective, my friend. Let’s dive into this a bit;
How do I know I might need a tolerance break?
Weed isn’t getting you as high as you want to be
You’re feeling brain fog
You’re anxious, sad or irritable every time you smoke
You’re spending too much money on weed
You’re spending too much time on weed
If I take a tolerance break, what effects will I experience?
That depends pretty heavily on how long you’ve been smoking, how good your product is, how often you smoke, and probably many more factors. But generally, most people will experience a few or all of these symptoms:
Decreased sleep quality
Decreased appetite
Mood Swings
Boredom
Intense dreams
Cold sweats at night
How can I make my tolerance break easier?
Essentially, a lot of self care.
Exercise – Hit the gym, go for a run, get on the floor and do some pushups if you need to. The more physically tired you get yourself, the better. For one thing, you’ll sleep much better if your body is tired out. You might not even notice the insomnia! Another benefit is the natural release of endorphins when you exercise. The runners high is no joke! When all your body wants is that elevated feeling, exercise can certainly duplicate it.
Hobbies – One of the hardest parts of a tolerance break can be the extreme boredom. The goal here is to keep your mind off of your tolerance break. If you’re sitting there fantasizing about smoking again, you’re just going to feel worse and worse. Instead, fill your time with just about anything. Read or write a book, draw some doodles, craft something, play an instrument, do a puzzle, play some video games, get lost in a movie, or even discover a brand new hobby. The world is still your oyster, even without the green.
Replace your Rituals – Personally, I love the ritual of smoking or vaping about as much as the act itself, so I replace it as well. Rather than grind up flower and pack a bowl, I’ll boil some water and steep a tea bag. I find it to be a great way to achieve a similar level of relaxation in my day. I get the process of physically preparing something, and then I can sit down and have a nice sip sesh as well.
CBD Flower – If you have access to it, CBD flower can be helpful in achieving a very similar ritual, as well as providing your body with all the benefits of your green, without any of the high. This method could be useful for helping you get back to sleep if you’re struggling with that. Personally, I find that this method can be a slippery slope, and usually just makes me want the real thing even more. Many people do have success with this, though!
How long will these tolerance break side effects last?
I find that the worst of it is over in about one week, though everyone is different. It could take you a couple of weeks. Generally speaking, after one week your appetite, sleep pattern and mood regulation should be much closer to normal again. Boredom can still be in full force, if you’re not actively fighting it!
How long should my tolerance break be?
This one is personal preference. If you’re a heavy smoker, even one day off will make a big difference in the effects you feel when you smoke again. I like to take occasional 7 day breaks to help my tolerance, and then a 30 day break when my body lets me know it needs one. This ensures my tolerance stays lower for longer once I come back to smoking.
How should I come back to smoking?
When you smoke again, start small! It won’t take much at all. After a few days off, I make sure to start with one puff to see how it’ll hit. Jumping right back in to the heavy hitters is a surefire way to raise your tolerance right back to where it was before.
Disclaimer: This page is not meant to be a full-on guide to growing anything. This page is meant to simplify the process, eliminating as much of the guess work and research for your initial setup as I can. This guide relies on the most affordable mycology supply website I’ve found, Midwest Grow Kits.
This guide is written for people who are following this detailed shroom-growing guide found on the subreddit, r/unclebens, except we’ll just use premade grain jars instead of Uncle Bens rice bags, to make it even simpler. The r/unclebens guide is the best guide I’ve come across, so it is still a perfect reference.
I created this page because when I first read through that guide, it was SO incredibly detailed, that the whole process seemed more complicated than it actually is.
Here is a simplified list of Everything you will need for the process, along with direct links to the products themselves, organized by source.
70% Isopropyl Alcohol from Amazon – Spray on and wipe everything involved, including your gloves. Cleanliness here is possibly the most important factor in making it to harvest.
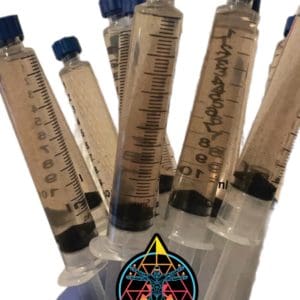
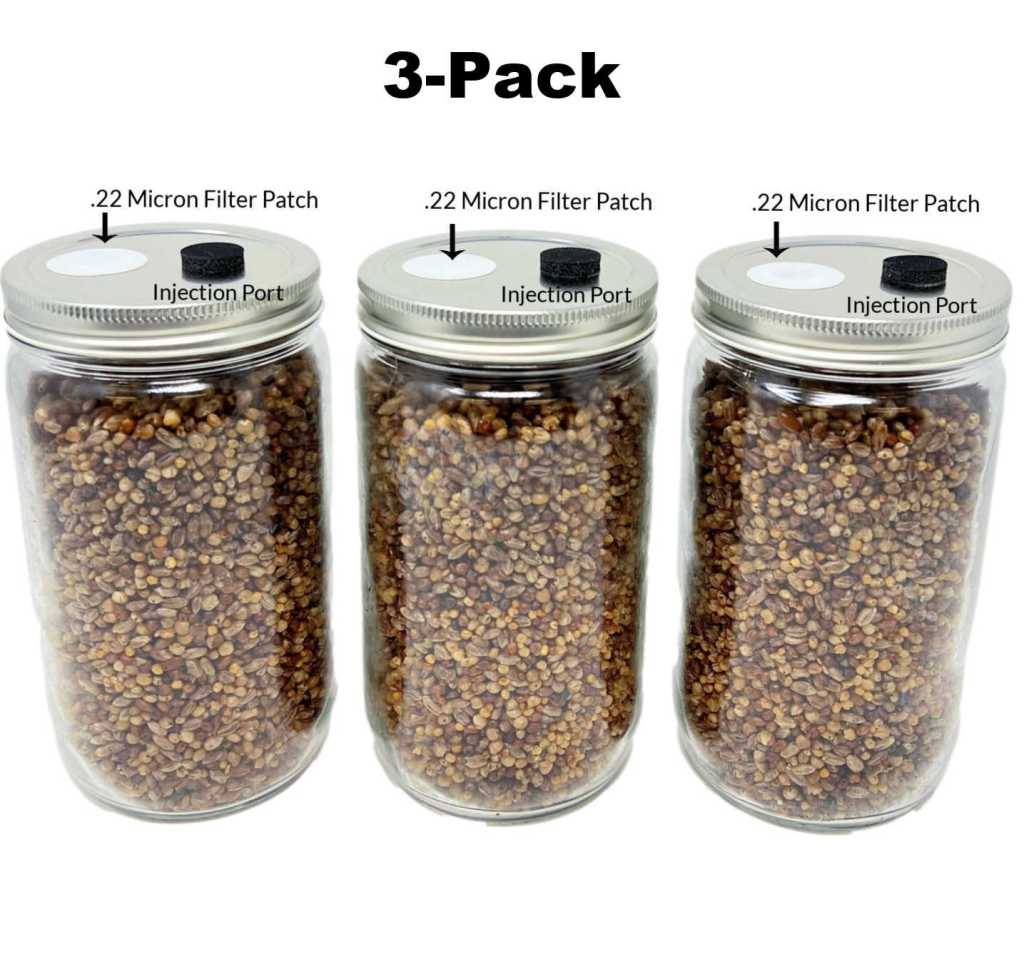
3x 24oz Grain Jars from Midwest Grow Kits – Inject each jar with 2-3cc of the spore syringe. These jars have higher chances of success than rice bags do, and less variables such as moisture content. Flame sterilize your needle with a lighter before each injection for best chances of successful colonization.
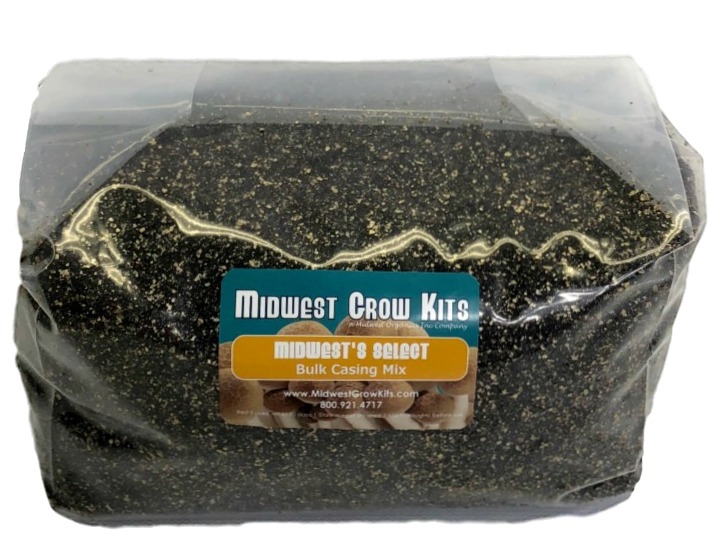
Premade Substrate from Midwest Grow Kits – Once your grain jars are fully colonized and white, mix one jar with an equal amount of this dirt-like substance in a 6qt shoebox container.
6qt ‘Shoebox’ Containers from Amazon – (It’d be better to buy 3 at a cheap store in real life. You can get 3 for $3. This link is just the best deal amazon had.)the perfect size for your mushroom-growing environment, to ensure you can keep the humidity levels just right. Sounds complicated, but comes easily with experience. (and following the guide on r/unclebens)
Fine Water Mister from Amazon – Helpful for when your substrate dries out a bit. Water drops hitting the mushrooms can harm your process, finer water droplets are safer.
Mushroom Dehydrator from Midwest Grow Kits – Every day, a new grower thinks they can dry their harvested shrooms in an oven, or an air-fryer. Sometimes this works, sometimes it burns their entire stash, leaving them with nothing to show for all their time, money and effort! Better safe than sorry, the way I see it. (Side note, I was using a dehydrator from amazon, but found this one to be much better due to it being custom built for this purpose.)
Dessicant Packets from Amazon – Throw your harvest shrooms in a jar and put a couple of these in there with them, to ensure they stay dry for years to come.
Digital Scale from Amazon – For weighing out your doses once you have dried your harvest. Very important to your experience, mushrooms can vary greatly in weight, leaving you with wildly different experiences, if you dose without a scale!
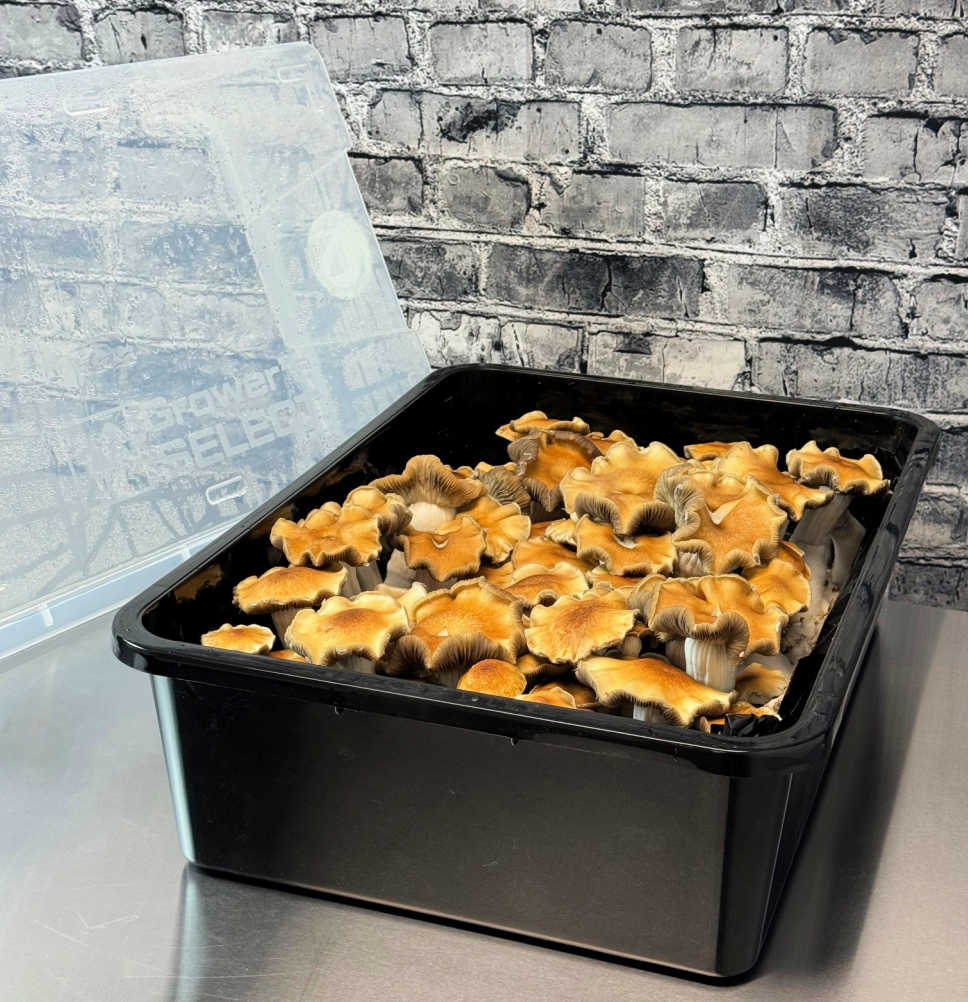
And there you have it! At the time of writing this, and where I am located currently, the grand total of this guide is $138. That’s a pretty solid price to have ounces, even pounds of beautiful, freshly harvested product. Enjoy 🙂
Feel free to reach out in the comments or contact our email with any questions, I’m always happy to help!
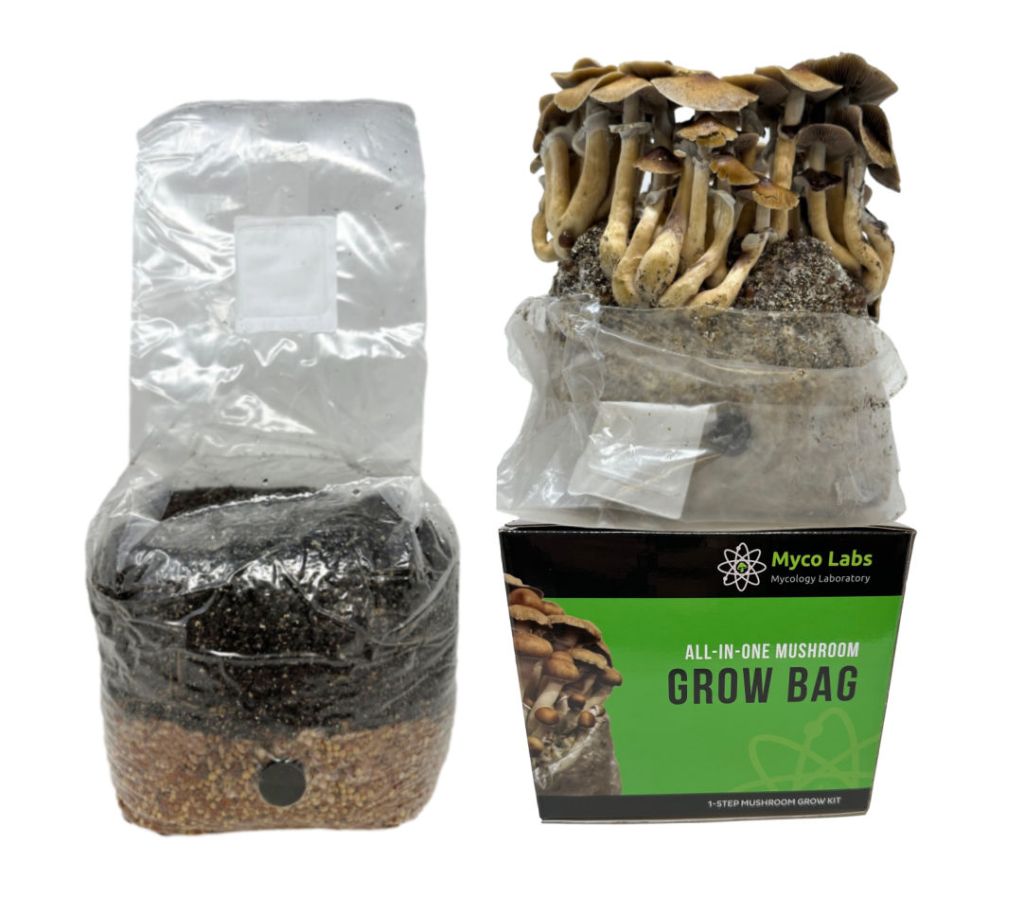
*Note: These All-in-One (AIO) Bags would be an even easier method than what I listed above, essentially combining the substrate and grain into one big bag. You would inject this bag and just wait, basically. I have seen little success with this method, others have had great harvests. If you’ve got the money to spare, can’t hurt to try, right?
*Another Note: Cheaper methods do exist, you could make your own substrate and grain spawn at home for even cheaper, it just requires more learning and some additional equipment. If you’re a beginner who feels intimidated by the process, just stick to the premade basics!